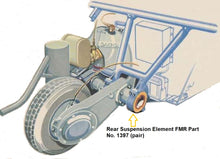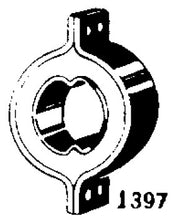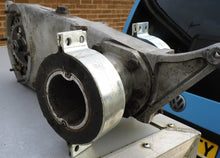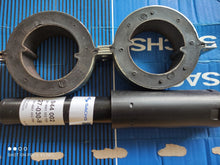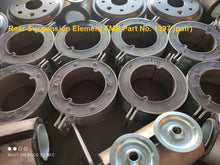
Completely new manufacture of the FMR rear suspension element using the latest composition and bonding technology to ensure long life and reliable performance. Years of research and refinement have created these parts with the correct angle to restore your Messerschmitt to the correct as built height and suspension performance. Hundreds have already been sold and fitted so you can be sure of the quality. A new shock absorber will be required to ensure optimum performance and long life. See our 1381 Sachs gas shock absorber:
Installation: We supply installation notes with each set and please make sure you install them in the correct orientation (see picture for correct position). This part requires extensive workshop equipment and skilled fitting to avoid damage. We offer free advice or help with fitting so we cannot accept any returns for damage caused by incorrect assembly or fitting damage. Price is for one pair (2 units) and must be installed as a pair. (that means you cannot use one old one with one new one).
Some suggestions on procedure for the suspension element renewal:
1. support the car completely off the ground at the rear so that the wheel is at least 3 inches off the ground.
2. Remove the knurled nut for the speedometer drive (located in the centre of the right rear suspension housing). You may need to acquire / borrow special long nose pliers for this task.
3. remove rear wheel
4. remove brake drum
5. screw in brake adjuster as far in as it will go.
6. remove chain cover (catch oil in a tray for disposal).
7. release the rear brake cable at the foot pedal and secure the barrel nipple so that it cannot fall back into the cable tunnel.
8. Using a screwdriver, push the brake horseshoe arm (located behind the chainwheel) up as far as it will go and wedge it in that position.
9. Using long nose pliers, manipulate the cable to the slot in the horseshoe so that the barrel nipple can be removed.
10. Remove the cable from the drive unit (there is a removeable steel insert in the aluminium casting)
11. Prise down the locking tabs on each of the eight retaining screws.
12. Remove all screws and the entire rear drive may be lifted out to the work bench.
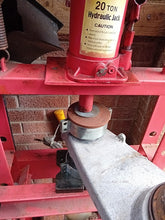
13. Using a large screwdriver inserted between the gap near the screw holes, prise the steel parts away from the rubber.
14. If this does not work, you may need to drill through the rubber.
15. When the rubber is removed, you are left with the steel inner core.
16. Using a cutting disc in an angle driver, carefully cut through the steel core to create and opening for a chisel.
17. Insert the chisel and drive with a hammer to cut through the steel sleeve.
18. When both sleeves have been removed. thoroughly clean the aluminium area with a wire brush.
19. Press on the new elements after ensuring correct orientation.
20. Re-assemble. Oil is 90wt GL1 gear oil.
You may find oil on the brake shoes and you can either clean it off or spend a few hours removing the hub and fitting new bearings. If you are not going to drive it at full speed (60mph), I would leave it. Removing the chainwheel is not easy and after 60 years may be so tight that the wheel is damaged by the high force required. Component diagram is on the newsgroup site.


