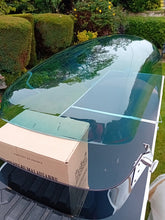
FMR 1326 Blue & Clear Domes - UK stock postcode WN8 6AT - collection or hand delivered (extra cost) UK delivery only. OEM quality from a renowned German supplier.
Plexiglass dome history and fitting notes – Schmittparts.
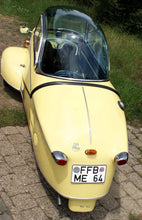
An iconic and unique feature of the KR200 is the plexiglass dome that gives an all-round view with a streamlined form reminiscent of a bubble that is probably the origin of the term “bubble car”.
From 1955 – 1958 all KR200 production was normally offered with a clear Perspex dome and there were at least two versions of the mould used to make it. Originally, it had a very sleek streamlined form rising in a shallow angle from the front frame. When Fritz Fend and Valentin Knott created FMR in January 1957 rescuing RSM from bankruptcy, the Perspex dome was an expensive bought-in component. Fend created a new mould to bring production in house reducing the cost and eliminating transport cost and quality issues. Very few of the original forms are left now as Perspex becomes less flexible and is prone to ‘crazing’ when permanently exposed to sunlight and weather. Nevertheless, some good examples exist in cars that have spent most of their lives in a garage.
From up to 1957, up to Chassis number 68168, the side window tracks were formed into the aluminium and the side windows had a rubber strip to stop them rattling. None of these cars had cabrio hoods but it was later offered as a factory extra. During the years when domes where unobtainable, The UK club offered a very attractively priced conversion kit for a cabrio hood. Original factory hoods have a front wind deflector fabricated from a metal pressing and fibreglass was used for club and other cabrio hoods. Converting the car back to a dome top is very easy except for the difficulty of filling the holes left from drilling the dome frame to take the press studs. It would be very difficult, but not impossible, to weld these and sand them flush again. Another alternative is to fill them with aluminium rod but some surface marking would be visible.
From Chassis number 68169 1957, the dome frame was modified to include fabric / rubber composite window tracks. At last the side windows operated smoothly and rattle free! Around this time the dome mould was changed – the original used steam as a pressure and heating medium and it became distorted. With the new mould, the very attractive streamlined form was lost. Recognising perhaps that people were becoming taller during the fifties years, FMR increased the height over the driver and there was much more room for the rear passenger as the downward slope at the rear of the dome was extended further back. New domes were made by the club in the eighties years and later batches were supplied from a German source. All these later batches have the higher profile mentioned above. Blue tinted domes were fitted to most FMR built cars from 1959 but there were some clear examples in later cars. The blue tint is not the best combination for all body colours and it probably looks best on the primrose yellow or turquoise cars. Cabrio tops were also offered new during this period but the clue to originality is the metal wind deflector that was normally painted silver.
When fitted in the frame, the dome has considerable strength – a Kabinews article described a roll over accident where the dome survived with a few scratches. If further evidence is needed, a factory picture exists of a group of workers standing on a dome to demonstrate its strength! A dome enhances the character of the car and must be more aerodynamic than the fabric hood. One disadvantage is the difficulty of keeping the cabin cool in sunny weather and a factory extra was available to help with this. Consisting of a fabric cover with sewn in loops, it was fastened to rubber suckers on the outside of the dome thus acting as a sunshade. There is a view that the tinted dome offers more protection from strong sunshine than the clear dome, but in the end it comes down to personal choice taking account of the above notes concerning original condition.
All domes are supplied oversize and must be cut to fit – not a job for the faint hearted due to the fragile nature of the dome when out of the frame. Fitting is described in the KR200 workshop manual, (Pt.no 1806) Place the dome in the frame – you may need to keep it pressed in using rubber bungee hooks. Normally the dome will lie on the outside of the frame slot. Mark the dome all around the frame using a marker pen. Material is then removed to the line as described in the manual until the dome fits the frame close to the inner frame edge. we have used a grinder for this job but the most effective and safest is an abrasive flap-wheel in an electric drill used in the manner described in the manual. Avoid grinding across the edge of the dome – it will crack easily if the grinding disc or flap-wheel grabs. A considerable amount of dust is generated and it may be preferable to do this job outside. An electrical charge is easily created if you are wearing clothes of synthetic material. Don’t be surprised if the plastic particles stick to everything including the dome and your clothes. Black Bostik contact adhesive was originally used to retain the dome at the front and each side for a length of 150mm. Note that silicone sealant is corrosive during the curing process, although I have not noticed any adverse reaction since. Apart from the corrosion issue, silicone is extremely strong and you will have great difficulty removing the dome after the curing is finished. We take the view that this was better than having the dome fly off at high speed. Any doubts about the safety of domes should be dispelled by the fact that almost identical parts are used in jet fighters up to twice the speed of sound!
See photo below - how the blue tinted dome enhances the appearance of this KR200
| 1326 Blue Kr200 Tg500 dome £1923.89 |
| 1326 clear Kr200 Tg500 dome £1807.29 |


